 Join WhatsApp
As the weather slowly starts to cool down, there is nothing more comforting than a warm, flavorful bowl of Lamb or mutton Paya. This dish is rich, aromatic, and deeply satisfying, especially when enjoyed with plain white rice or soft homemade roti. Mutton Paya is a traditional recipe loved by many, not only for its taste but also for its nourishing qualities. It may look like a complicated dish, but trust me, it is actually very simple when prepared step by step with patience and care.
Today, I am sharing my favourite mutton Paya recipe that I usually prepare in a pressure cooker to save time. You can also cook it in a regular pot; it will just take a little longer. The final result, however, will still be just as delicious. This recipe focuses on bringing out the true flavour of the paya without overpowering it with tomatoes or yoghurt. The aroma, the texture, and the taste all come together beautifully in this comforting dish.

Mutton Paya Recipes Step By Step
To begin, take four lamb or goat paya and wash them very well under running water. Cleaning the paya properly is very important to remove any impurities. Once they are thoroughly washed, place them in a pressure cooker. Add a little turmeric powder and salt according to your taste. These basic seasonings help start building flavour right from the beginning.
To completely remove any strong smell from the paya, add whole spices. Bay leaves, a small piece of cinnamon, cloves, black peppercorns, green cardamom, and black cardamom work perfectly for this. These spices not only remove odour but also infuse the stock with a deep, warming aroma. Next, add about one tablespoon of ginger and garlic paste. This adds another layer of flavour and helps balance the richness of the lamb.
Now add one small onion, roughly chopped. The onion will cook down and add natural sweetness to the broth.
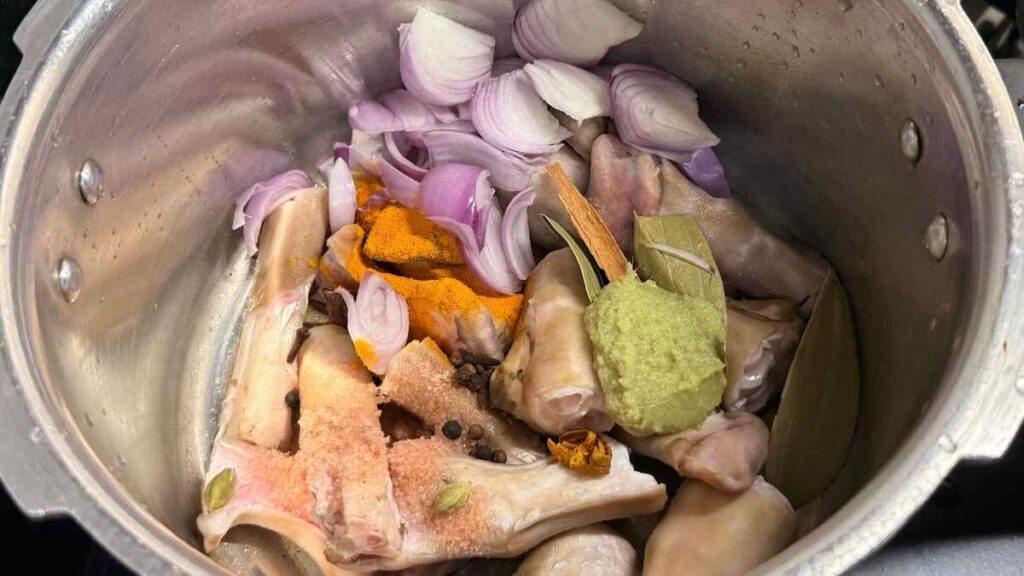
Pour in about one litre of water. The consistency of this dish is meant to be slightly thin, not too thick. If you prefer a thicker paya, you can reduce the water slightly, but one litre works perfectly for a balanced gravy.
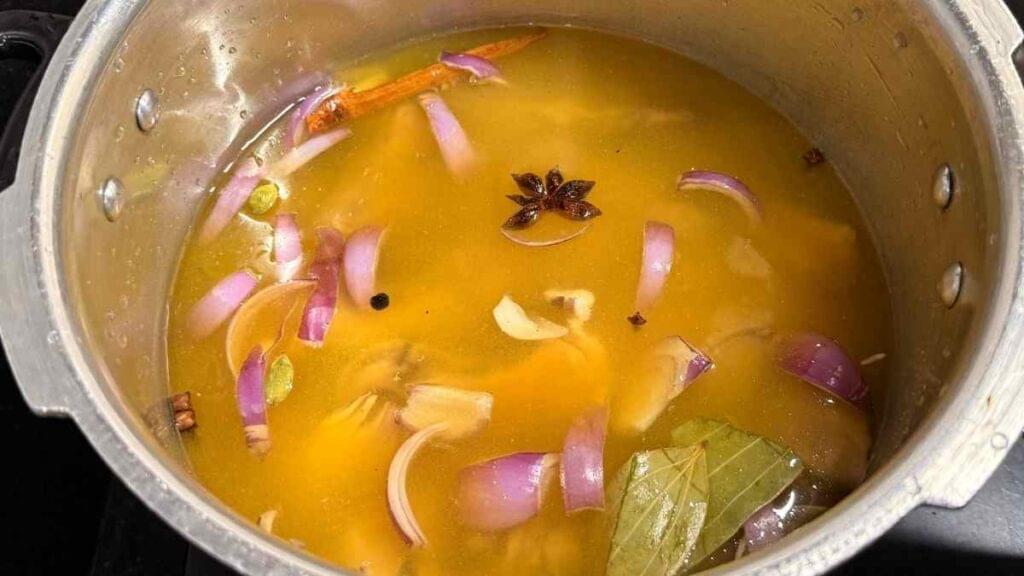
Gently mix everything, close the lid, and place the pressure cooker on high heat until it whistles once. After the first whistle, lower the heat and let it simmer for about thirty minutes. This slow cooking allows the paya to become tender and releases all the flavors into the stock.
While the paya is cooking, you can start preparing the masala for the gravy. Heat about one-third cup of oil in a pan. Take one large onion and make a smooth paste using a blender. Add this onion paste to the hot oil. You can also fry sliced onions first and then grind them, but using the paste directly saves time and still gives excellent results.
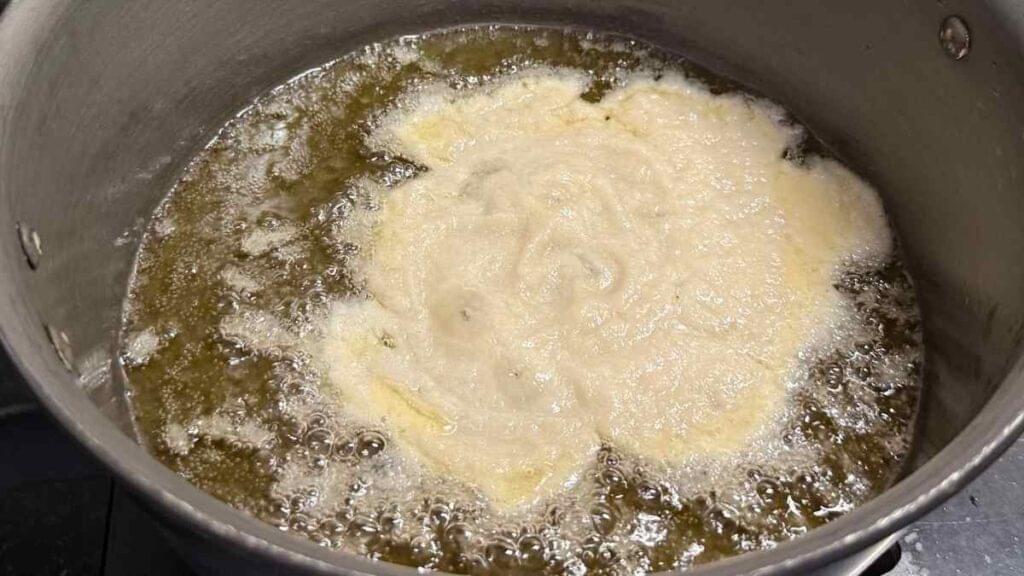
Cook the onion paste on medium heat until it turns a beautiful golden brown. This step is very important because well-cooked onions give the gravy its rich color and deep taste. Stir continuously and be patient, as this process takes a few minutes.
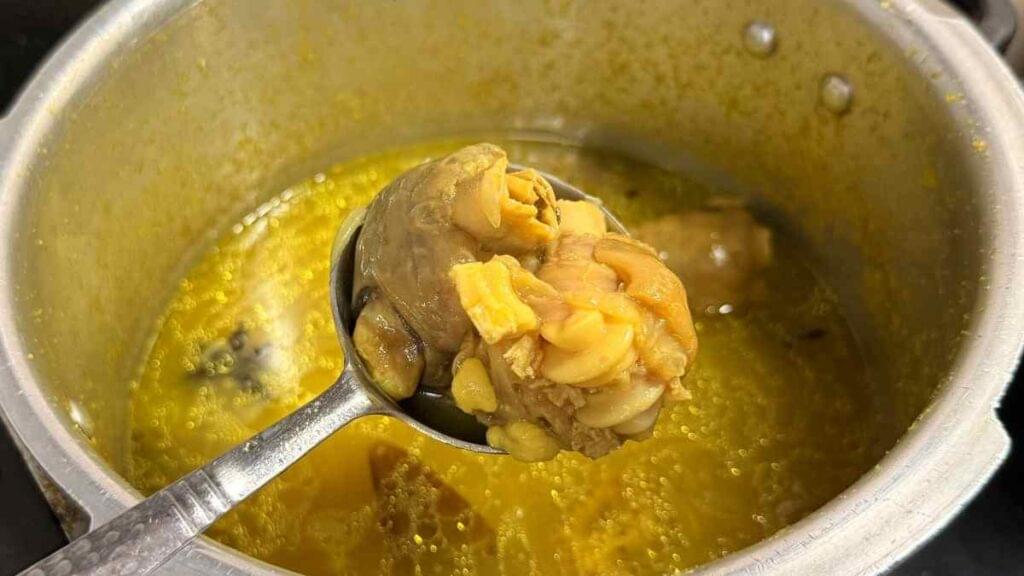
After about thirty minutes, the paya will be perfectly cooked. Carefully open the pressure cooker once the pressure has released. Remove the cooked paya and set them aside on a plate.
Strain the stock and keep it ready, as this flavorful yakhni will be added later to the gravy. Also, remove the boiled onion pieces from the stock and keep them aside. They will be added back to the masala.
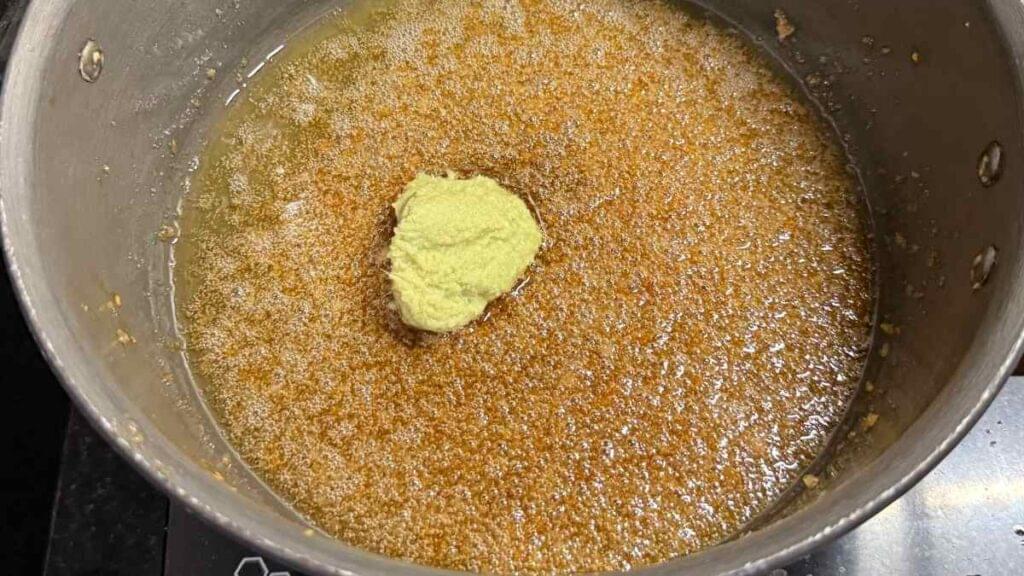
By now, the onion should be nicely golden. Add one tablespoon of ginger and garlic paste to it and mix well. Fry for about thirty to forty seconds to remove the raw smell. Keep the flame low at this stage.
Add a little water before adding the dry spices so they do not burn. Now add coriander powder, a little cumin powder, Kashmiri red chilli powder for colour, and hot red chilli powder according to your spice preference. The Kashmiri chilli is optional but highly recommended for a rich red colour without too much heat. Add turmeric powder and one teaspoon of fennel powder. Fennel powder is a key ingredient here, as they enhance the aroma and completely removes any remaining smell of the paya.
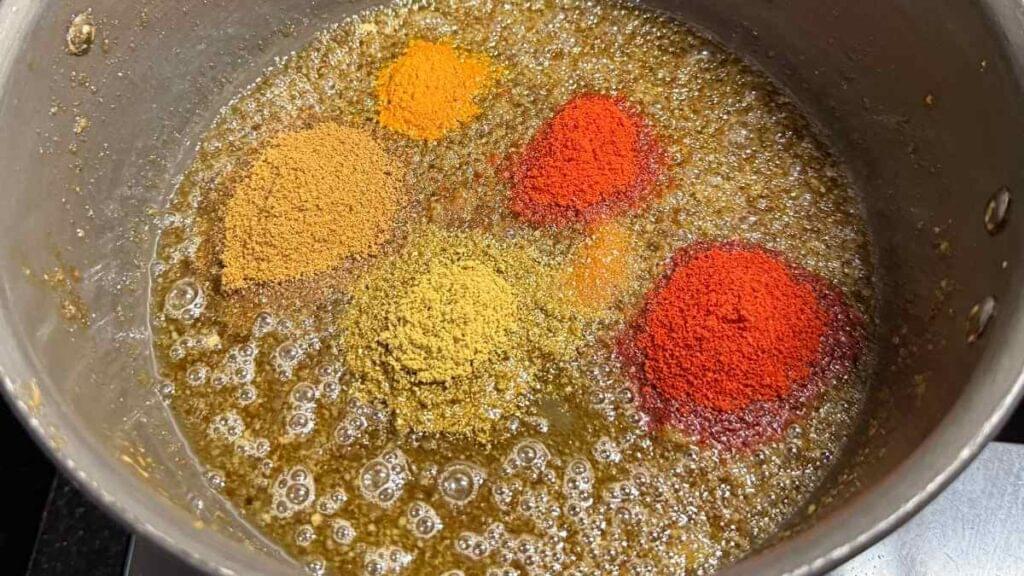
Roast these spices well. The better the spices are roasted, the better the final taste will be. If needed, add small splashes of water and continue cooking. This roasting process can take around 5 to 7 minutes in total. You will know the masala is ready when it becomes thick, aromatic, and oil starts to separate.
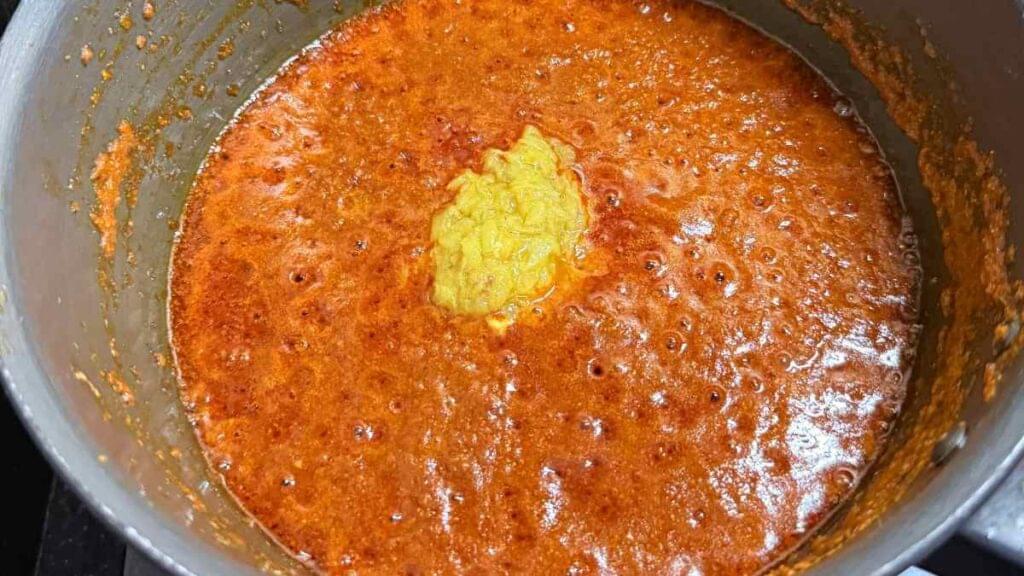
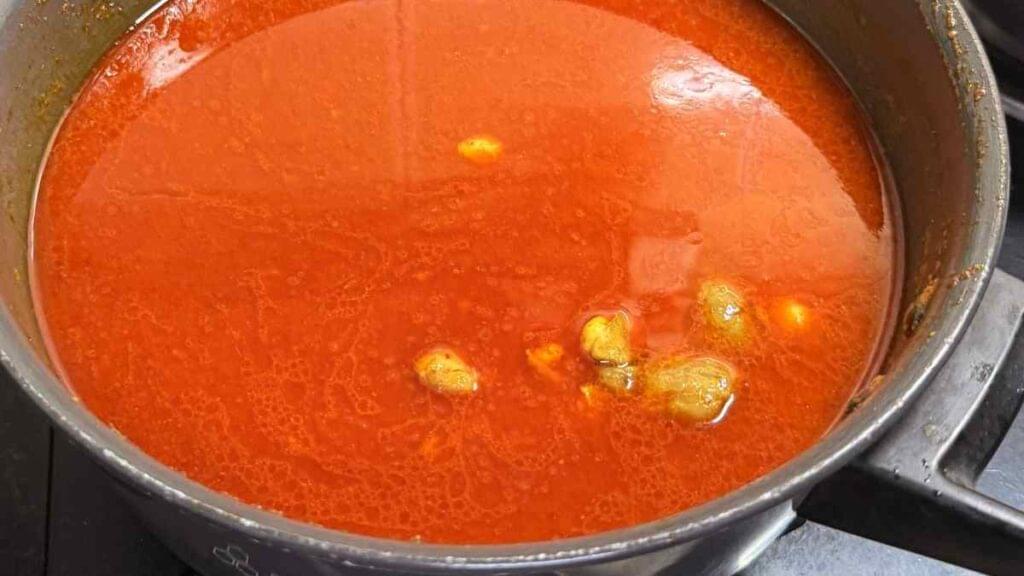
Now add the boiled onion that was removed from the stock. Since it is already soft, it will mash easily when stirred.
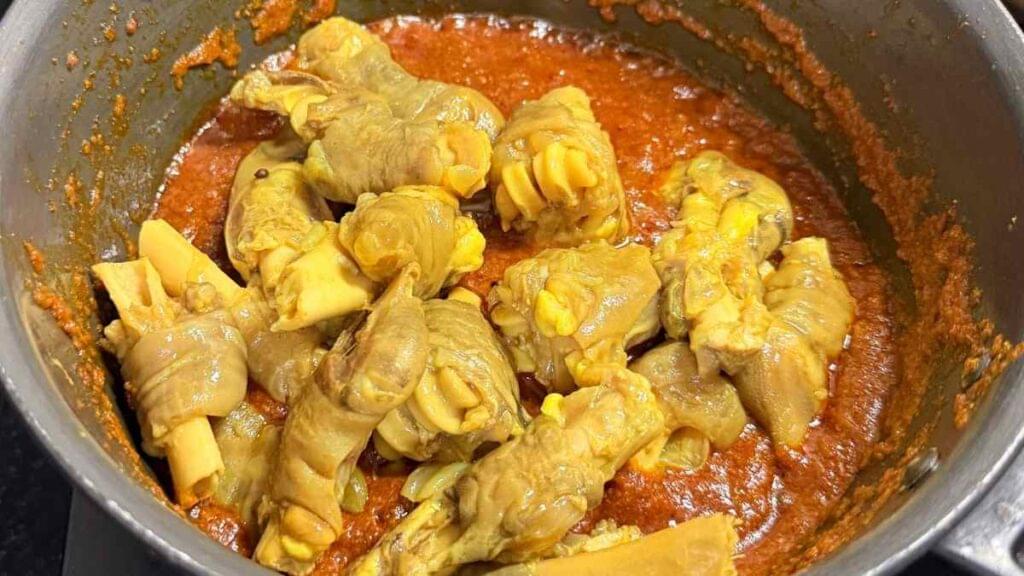
Add the cooked paya to the pan and fry them well with the masala for about 2 to 4 minutes. This step helps the paya absorb all the spices and greatly enhances the flavour.
Once the paya are well roasted, slowly add the strained yakhni. From the one litre of water added earlier, around eight hundred millilitres of stock will remain. Pour all of it into the pan. Add salt according to taste and mix gently. Taste the gravy and adjust the seasoning if needed.
Let the gravy come to a gentle boil. Cover the pan and let it simmer on low heat for about fifteen minutes. Stir once in between. The gravy should not be too thick or too thin. As it cools, it will naturally thicken.
After fifteen minutes, sprinkle ¼ teaspoon of garam masala powder for added aroma. Add julienned ginger, green chillies and freshly chopped coriander leaves.
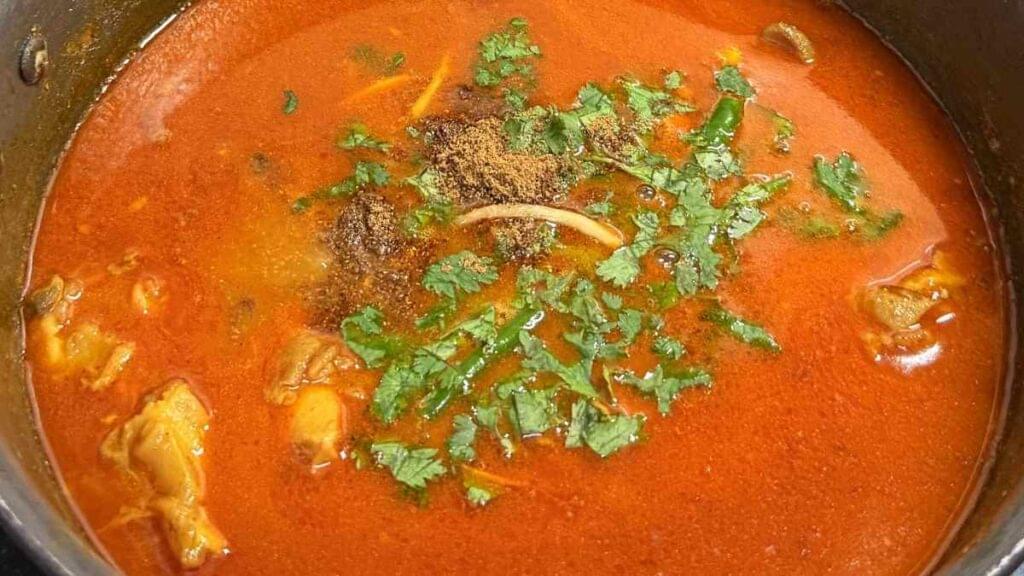
These final ingredients lift the dish and give it a fresh, vibrant flavour. Mix everything gently and cover again for two to three minutes on very low heat so all the aromas are absorbed.
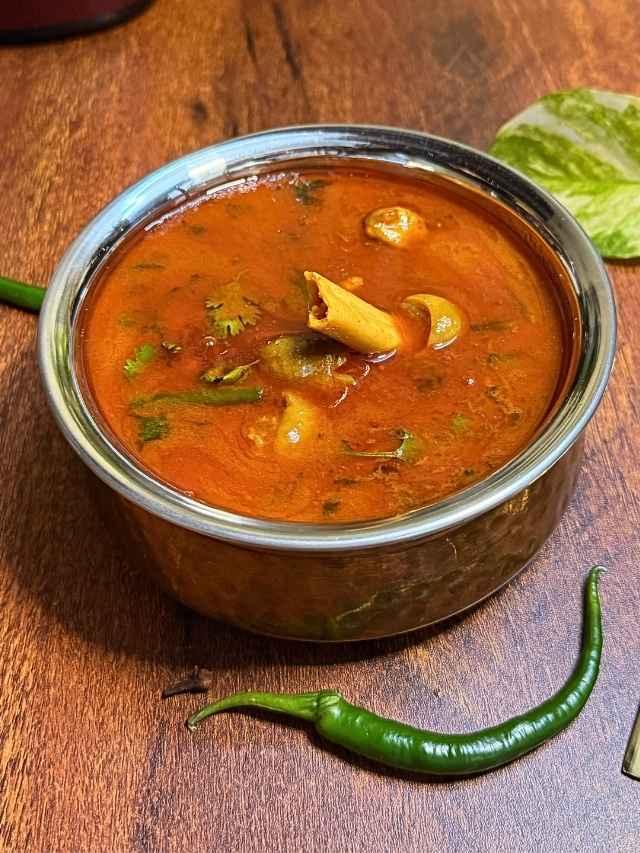
Turn off the heat and let the oil rise on top. This is a sign that the paya is perfectly cooked and ready to serve. The dish looks rich, glossy, and incredibly tempting.
I have not added tomatoes or yoghurt to this recipe because without them, the true flavour of lamb paya really shines. You can add them if you like, but I strongly recommend trying this version at least once. The taste is pure, traditional, and deeply satisfying.
Transfer the Lamb Paya to a serving bowl and garnish with fresh coriander leaves, ginger slices, and green chillies. Serve hot with plain white rice or soft homemade roti. This dish is so delicious that you will find yourself wanting to enjoy it again and again.
This mutton Paya recipe is simple, comforting, and perfect for cooler days. I hope you enjoy making and eating it as much as I do. If you try this recipe, I am sure it will become one of your favourites.
Ingredients
Read this also: